
Creating a Server 3 min read
This walkthrough covers publishing your API Hub as a server in the Trust Framework. You MUST complete this before registering API resources or being discoverable by TPPs.
Before creating a server:
- Your organisation MUST be onboarded to the Trust Framework with the necessary admin permissions. See Onboarding if you have not yet completed this step.
- Your API Hub MUST be provisioned and you MUST have received your environment-specific configuration, including your well-known discovery document URI.
From + New Server to a published Authorisation Server
Obtain Your Issuer
Before creating the server entry, retrieve the
issuervalue from your API Hub's well-known discovery document. The discovery document URI is provided as part of your environment-specific onboarding configuration.Open the discovery document URI in a browser or HTTP client and locate the
issuerfield. You will need this value in Step 3.Navigate to your Organisation
- Sign in to the Trust Framework directory.
Environment MappingEnsure you are creating the server in the correct Trust Framework environment:
- Pre-production API Hub → Sandbox Trust Framework (
web.sandbox.directory.openfinance.ae) - Production API Hub → Production Trust Framework (
web.directory.openfinance.ae)
- Navigate to your Organisation.
- Open the Auth Servers section.
- Click + New Server.
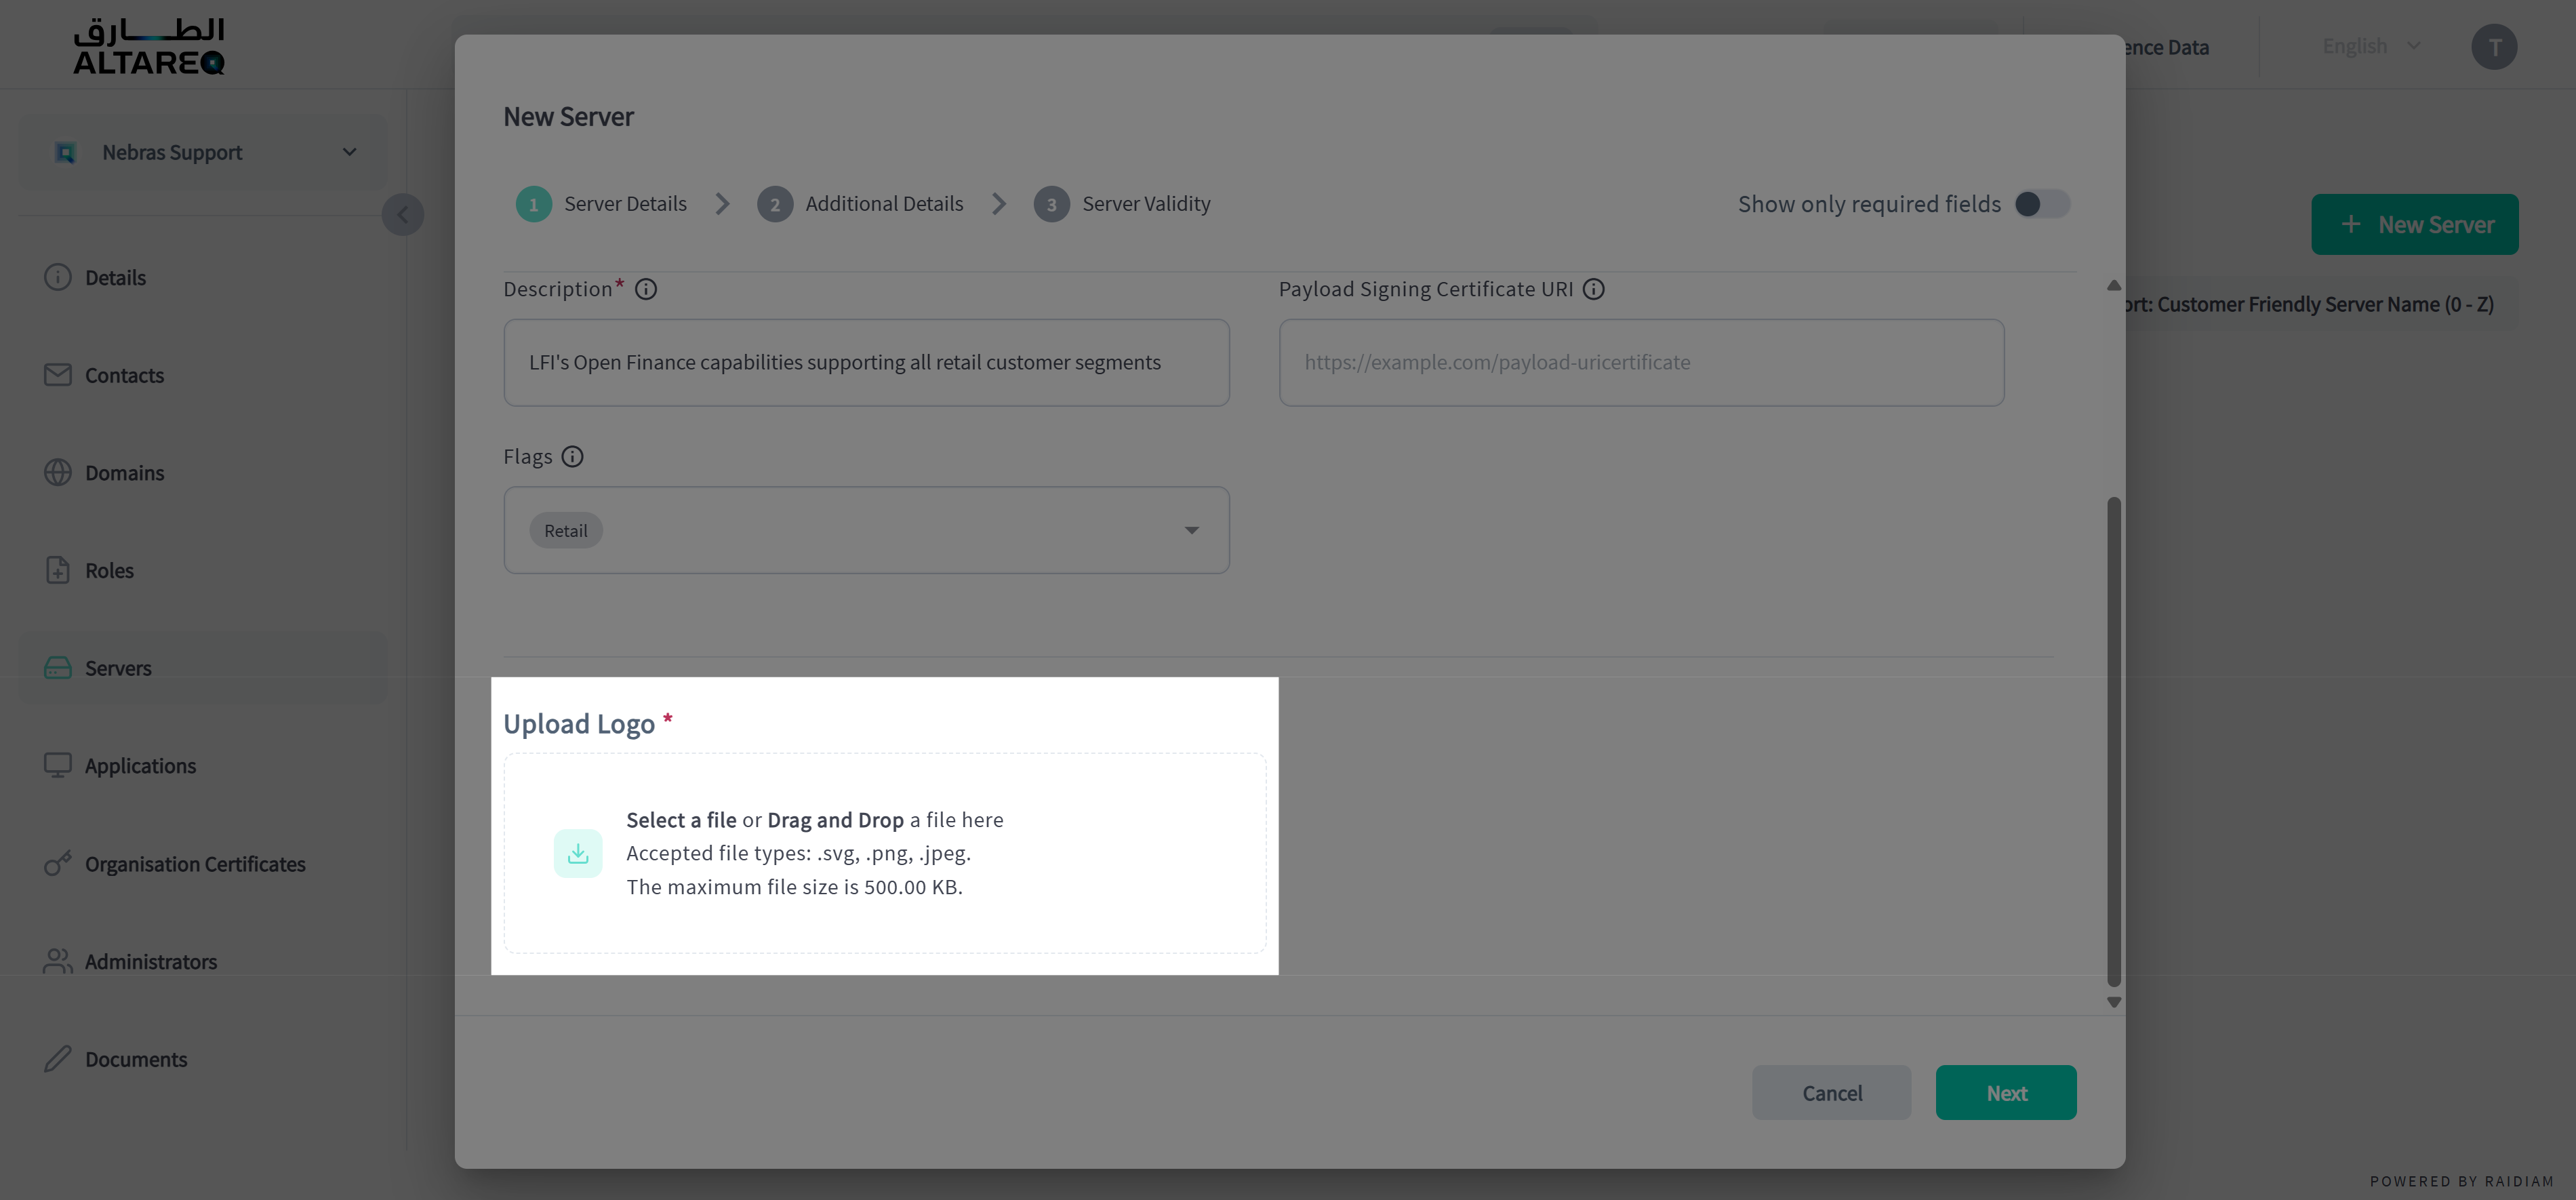
Provide the Server Details
Fill in the required fields. These values are published in the directory and are visible to TPPs.
Field Guidance Customer Friendly Server Name A public-facing name that reflects the brand this API Hub supports (e.g. Acme Bank RetailorAcme Bank Business). If your institution operates multiple API Hubs for different brands, each MUST have a distinct name.Issuer The issuervalue from your API Hub's well-known discovery document, obtained in Step 1.Description A short description of the Open Finance service (e.g. Open Finance APIs for Demo Bank's retail customers).Set the Account Type
Indicate the account type(s) supported by this server:
- Retail — personal and individual customer accounts
- SME — small and medium enterprise accounts
- Corporate — corporate and institutional accounts
This allows TPPs to identify which server to use when requesting access to a specific category of accounts.

Account types selection Upload the Logo
Upload a logo for this server entry. The logo MUST match the brand that this API Hub supports.
If your institution has multiple API Hubs (e.g. one for retail and one for business), each server MUST use the logo corresponding to its specific brand. This logo is displayed to TPPs and end users during consent and authorisation journeys.
Logo upload Save the Server
- Skip Additional Details and Server Validity sections.
- Click Save to register the server.
- Your Server now appears in the Server section of your Organisation.
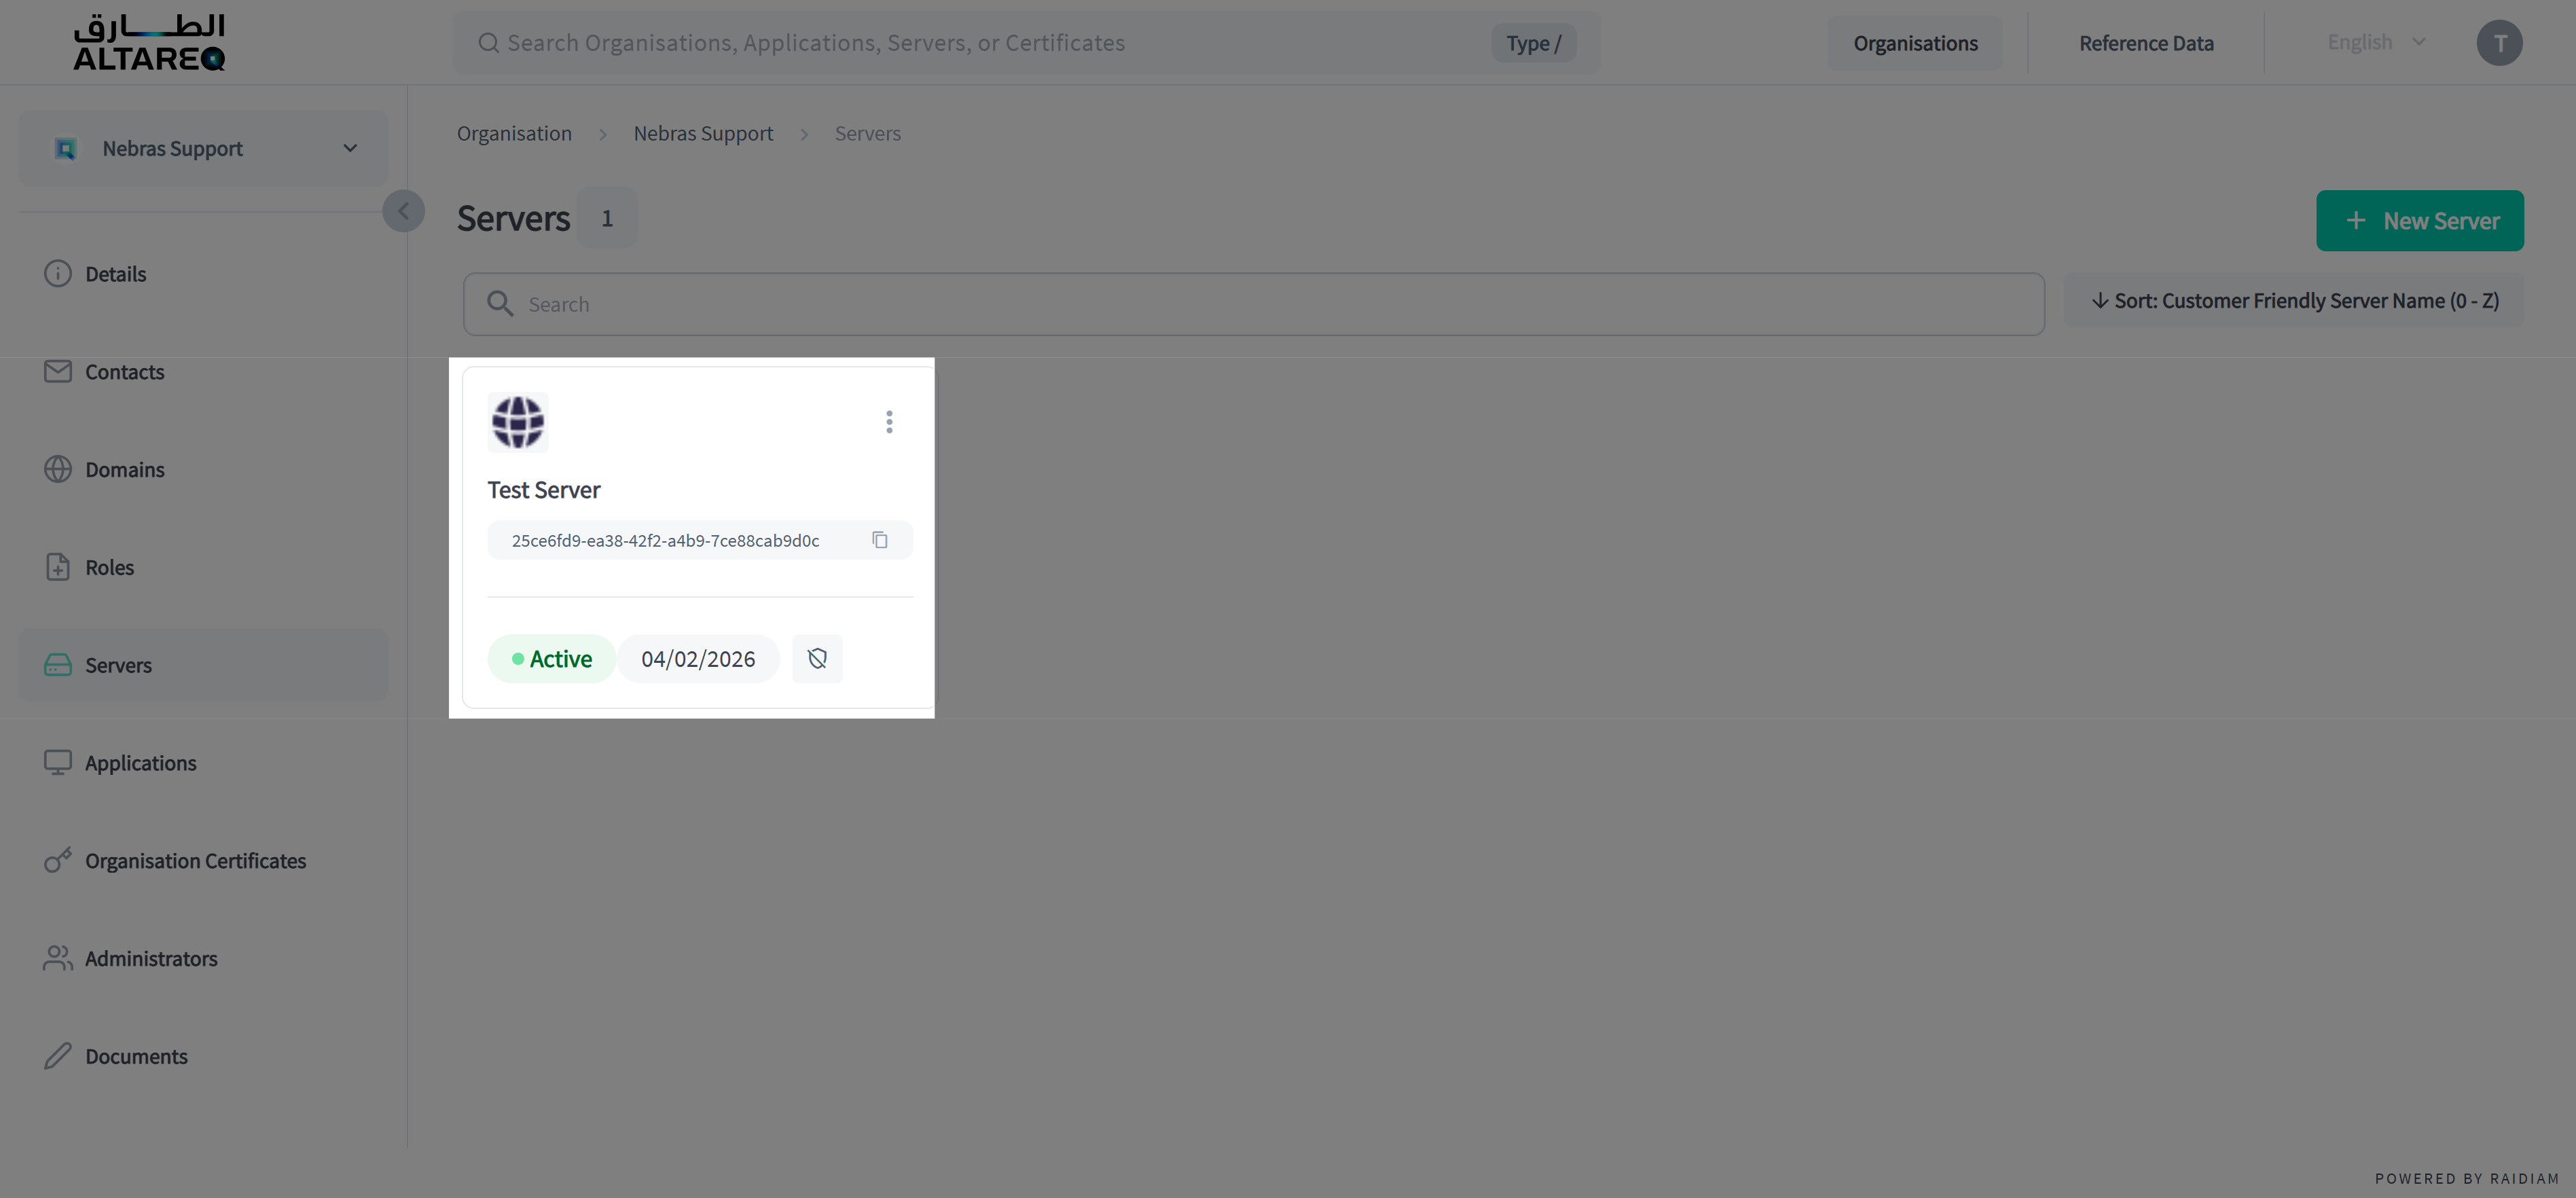
Server saved
After creation, your Authorisation Server ID is visible on the server detail page. It is also discoverable to TPPs via the API Discovery process.
Add API resources to your server
With your server published, describe the APIs your institution exposes by registering API resources.